Pages

Friday 5 February 2016

Developing a custom keyboard extension for iOS

I was recently working on a custom keyboard application. I was trying few things (which of course the client asked to do) for many hours, then later I came to know that they are not really possible. I thought I could share them here, so that it may be helpful to someone.

So before developing a custom keyboard extension for iOS, one should consider these things too.

1. No transparent background for the keyboard.
      You can't have a transparent background for your custom keyboard. By default the iOS provide a view which has the default keyboard's background. It may be in light/dark depending on the keyboard appearance (light/dark). You can, of course set any colour to your container view of the keyboard, but not the clearColor.

2. Your keyboard can't be a stand alone. You must have a Main app also. My focus was only on the keyboard, literally the Main app is useless in my case. So I added the About Us and Support screen where I provided some information about my client and instructions about how to enable/use my keyboard.

3. You can't share any information directly from your Main app with your keyboard and vice versa. You have to use App Groups for that. Since Keyboard extension is more like a separate app, both the keyboard and the main app could share the same app group. You can also store the data you don't want to share directly in the default.
   For e.g in my keyboard I stored the last used keyboard, last used theme... information like that directly in the user default. But I also had in app purchases and the user can purchase them only for the Main app, so I stored the purchases details with the app group defaults, which both the apps can share.

4. You can't draw key popups outside your keyboards bounds. So I inserted one more row (with some special characters which will be used more often) in the top of the keyboard, which don't have any popups. And the popups for the second row can be shown now without any problem

5.  Even you don't care about the decimal and special characters, all the keyboard apps must provide the decimal and special characters keyboard in order to pass the app review process.

6. Auto correction, text selection, cut/copy/paste - not possible.

7. Had some problems while deleting characters when using my custom keyboard in Safari address bar, which is normal

8. Use the current selected keyboard type and return key type from the textDocumentroxy and change your keyboard appearance and the return key title accordingly.

9. You have to provide the primary language for your custom keyboard in the info.plist file. Since my keyboard supports multiple language I can't use en/fr/it something like that, but there is a special option just for this. I used the key 'mul' in the primary language of the plist which means 'Multiple Languages'.

Tuesday 22 September 2015

Validating Your Version of Xcode

Ghost in XCode


Apple recently removed many apps from the appstore which were built with fake version of XCode. Most of these apps were submitted for the Chinese app store.

The reason being, in China the Apple servers are very slow. So when the developers download XCode which is more than 3 GB directly from the AppStore, it takes hours for them to finish. As a result they download the XCode from some other third party mirror links. But this copy of the XCode is a malicious one is already infected by the hackers. As a result when we build our apps with this version of XCode, malicious code is injected with our app.

So we must be very careful with where do we get our XCode from.

Apple already have a way to find the malicious apps from the OSX 8 called GateKeeper which tells the user whenever we try run a malicious (not code-signed) application in our Mac. But if you disabled the GateKeeper in your Mac you won't get the warning.

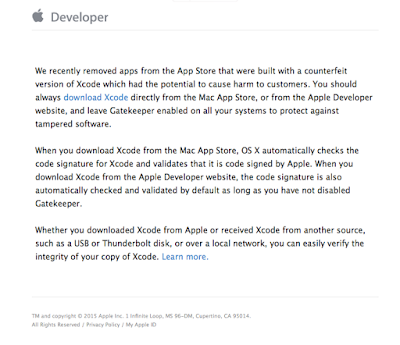
Apple sent out mails to all the developers to check if they are using the right version of XCode. To find out if you are using the un-infected version of XCode, run this command in the terminal

spctl --assess --verbose /Applications/Xcode.app
More info on this here:
https://developer.apple.com/news/?id=09222015a

Friday 24 April 2015

User defined run time attributes

User defined run time attributes are one of the hidden(likely) gems of the XCode which helps you to customise/configure your UI object in the interface builder itself, without having to write code.

The "User defined run time attributes" uses the Obejctive-C's already existed concept called Key Value Coding. With the Xcode 6, this is a game changer, see here IBInspectable and IBDesignable

Key value coding is a mechanism which helps us to access the properties of an object indirectly by name (or key, which is a string) rather than directly using the accessor method.

That means, say for example you have the property text for the UILabel, you can use the user defined runtime attributes for changing its value.


Wait, who would do that? The UILabel control already have the IB properties for giving the text.
But, think of some other properties that the IB doesn't have. You can do that in the u.d.r.a (ah.,, user defined run time attributes, I am tired of typing this).

For example, here I have a custom class called CustomLabel which is a subclass of UILabel which have a property called fontName. When I give string here, my CustomLabel will use this string and updates it font. I can assign the value to this fontName in the Xib itself like this.


The fun part is you can give not only key but also the key paths. (For those who doesn't know the difference between the key and the keypath, text is a key for the UILabel whereas layer.cornerRadius is a keypath for its corner radius)

For example, if you want to change the corner radios of a UIView, you can add a u.d.r.a  with the keypath layer.cornerRadius.


Don't try to give the layer.borderColor in this way, because borderColor needs a CGColor object but you can only give UIColor with the u.d.r.a. If you want to achieve this, you can add a category for the CALayer with a UIColor property and you can write your own logic to change its borderColor.

Note:
  If you give a u.d.r.a to a UI object, that doesn't have a property with that name, you will get a warning from the debugger like this. In the previous Xcode, it will raise a invalid argument exception and crash.


Here is a list of attribute types that you can use in the u.d.r.a.


For the sake of clarity, I am adding the screenshot of my CustomLabel class here.


Tuesday 14 April 2015

How to change the UITextField's height in the Storyboard/Interface Builder?

When you design your interface for iOS, you can’t change the height of the UITextField directly in xib, when the textfield’s type is UITextBorderStyleRoundedRect. If you need a little taller text field, especially for iPad, either you have to do that in code or you have to change the text field type to some other. But this little trick will help you to do that in xib itself. 


If you are using the constraints, you may specify the height constraint for the textfield.

1. Give some identifier to your textfield, so that you can find your textfield easily in the next step.


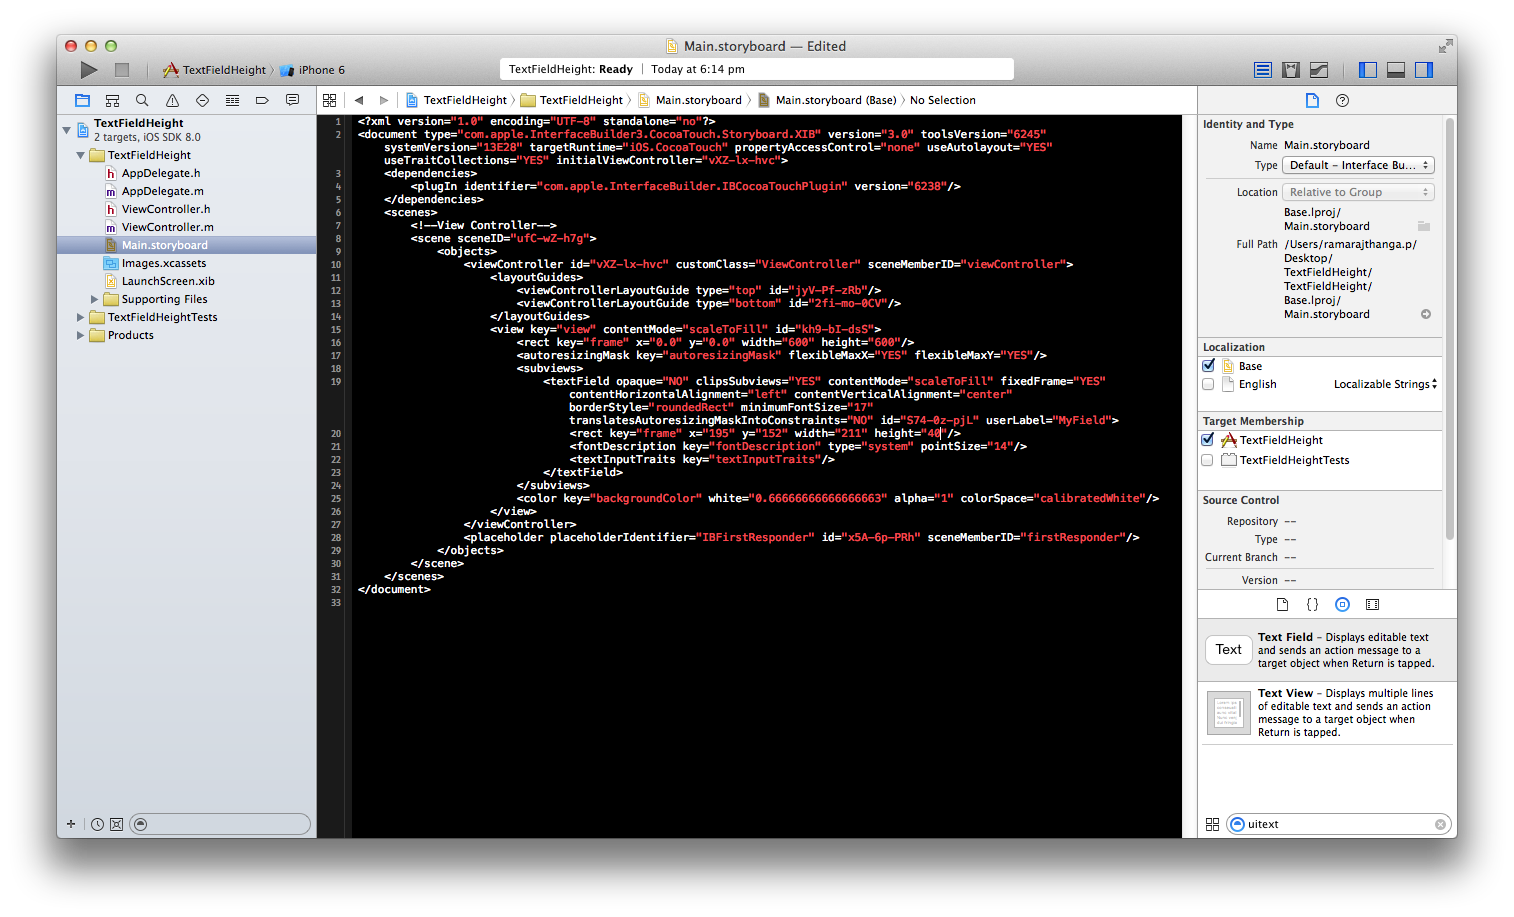
2. Right click the storyboard/xib file, select Open As -> Source Code. The storyboard/xib is basically an XML, so its attributes can be edited directly. 


3. Search your textfield, and change its height attributes. I have given 40 for my textfield here.
<rect key="frame" x="195" y="152" width="211" height="40"/>


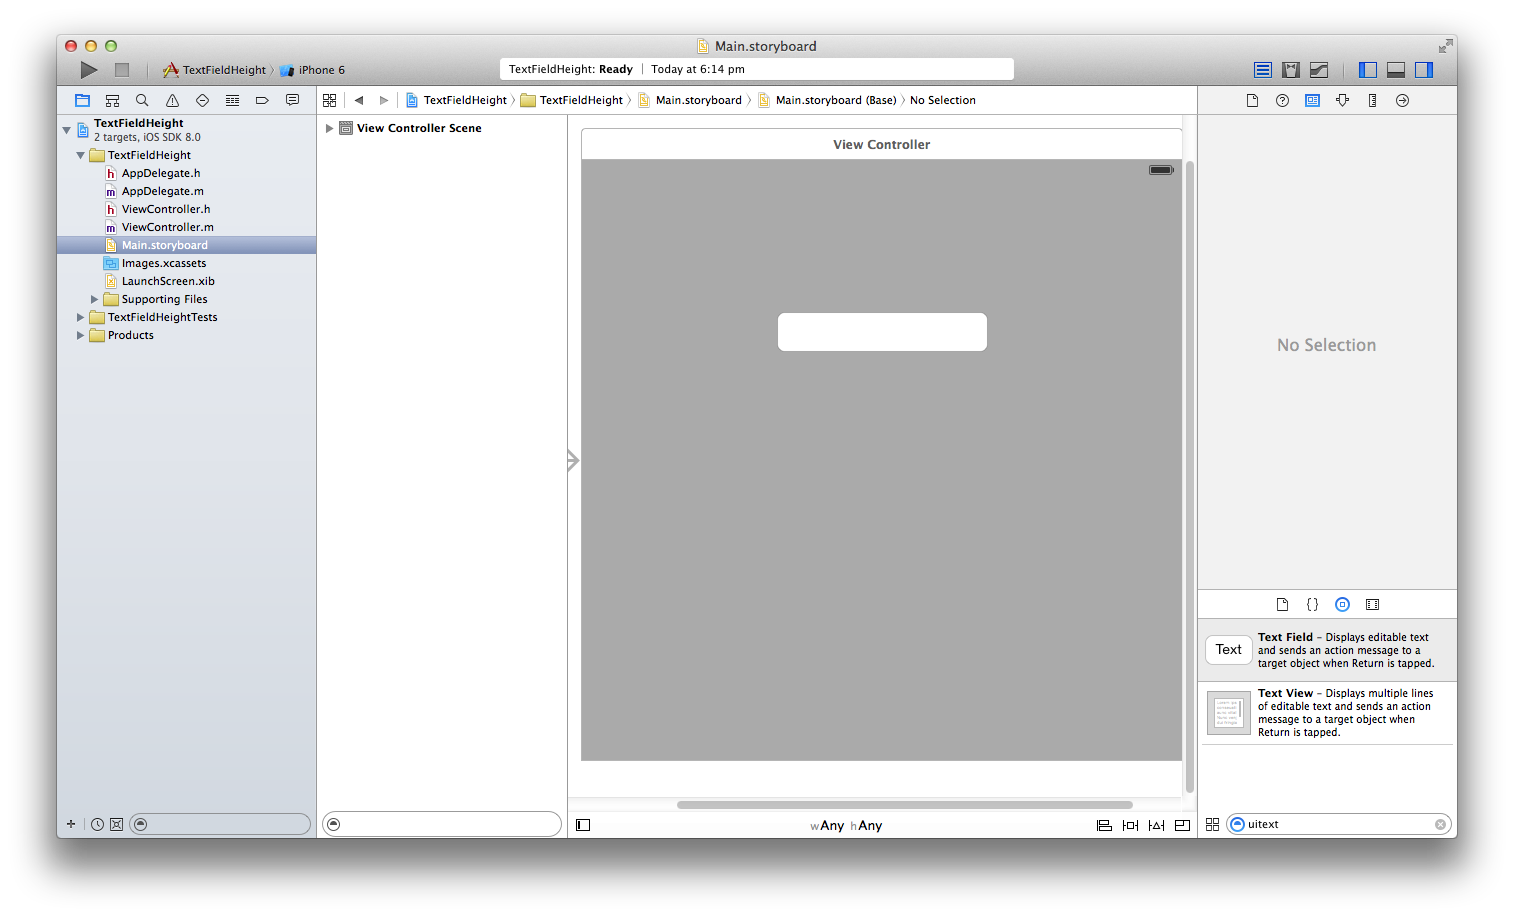
4. Now if you open your xib as Interface Builder - Storyboard file, by following the step 2, you will find your textfield’s height bigger.


Here is the video if want to take a look.


So easy as it looks like. You can also edit any attributes of any controls like this. But, make sure you don’t break the file format.

Besides, I am wondering why apple’s HIG don’t allow to change the text field height.

Tuesday 17 February 2015

IBInspectable and IBDesignable

One of the cool feature that was introduced in the Xcode 6 is enabling interface builder attributes for your custom view. i.e., the attributes that appears in the right when you click a control in the interface builder. Your custom control can have its properties right in the interface builder itself.


The closest thing you would do previously is, add your custom properties in the User defined run time attributes.
Previously, when you use a custom control, you have to do all the things by code. But now with this new feature, you can design your custom view in the interface builder itself. You can see how your custom view will appear while designing. There will be a lot of open source libraries in the future using this.
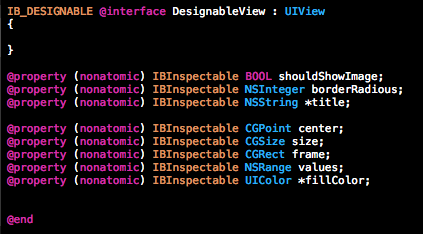
Apple have introduced two new attributes to make this happen IB_DESIGNABLE and IBInspectable. You have to prefix IB_DESIGNABLE before your custom view and add IBInspectable as the attributes to its property. So, a sample class will look like this.


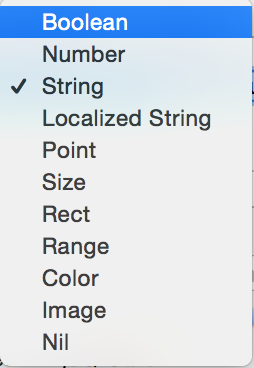
The following types can be used for IBInspectable.
  • Boolean (BOOL)
  • Number (NSInteger)
  • String (NSString)
  • Localized String
  • Point (CGPoint)
  • Size (CGSize)
  • Rect (CGRect)
  • Range (NSRange)
  • Color (UIColor)
  • Image (UIImage)
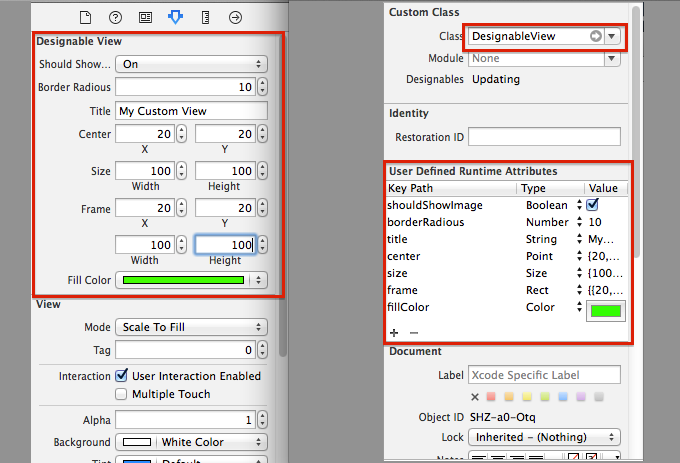
The properties that have the IBInspectable attribute can be configured in the attributes inspector of the interface builder. And they will appear in the User defined run time attributesalso. They both can be used interchangeably.


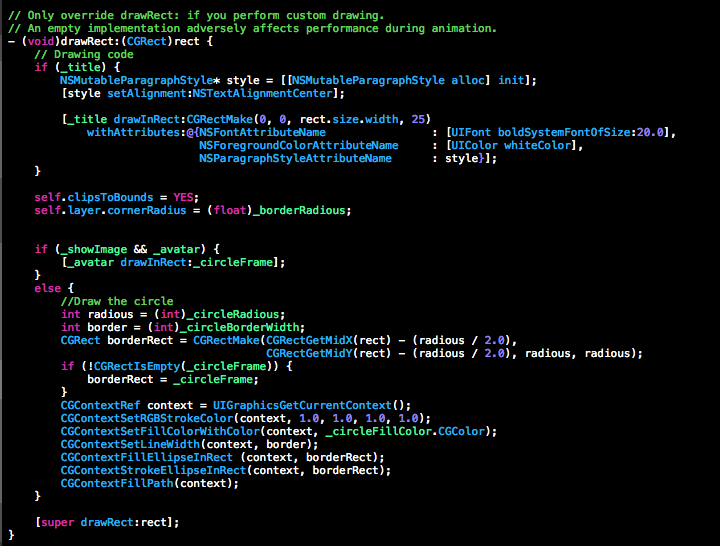
You can write your code in the .m file with the IBInspectable properties setters or the drawrect method.


You can also debug your custom view without running. Simply open a assistant editor and put a breakpoint in your code and Choose Editor > Debug Selected Views.
IBInspectable can be used in your custom UIView/UIControl subclasses, categories, extensions. Don’t do expensive coding with the IBInspectable properties. The interface builder will try to compile the code no longer than 200ms. If it can’t compile within this period, the Xcode gives error.

In the first screenshot, I have added a custom text field which is of course a subclass of the UITextfiled.I can change the border color of the text field from the interface builder itself.

The apple docs is here and the sample source code is in the github.


Grap the code and play around yourself and make some useful controls with this. 

Monday 9 February 2015

Key Value Coding and Key Value Observing


Key Value Coding:
Key value coding is a mechanism which helps us to access the properties of an object indirectly by name (or key, which is a string) rather than directly using the accessor method. The key value coding cannot be confused with the NSDictionary’s keys.

For e.g. the UITextField has a property called text which gives the current text displayed in it.
You normally access it by calling the following accessor method of the UITextField.
[myTextField setText:@"Hello"];
NSLog(@"%@", myTextField.text);
The above statements can be re-written by using the Key-Value coding as follows.
[myTextField setValue:@"Hello" forKey:@"text"];
NSLog(@"%@", [myTextField valueForKey:@"text"]);
The KCV can also be nested.
For e.g
[self.view setBackgroundColor:[UIColor blackColor]];
can be replaced with
[self setValue:[UIColor redColor] forKeyPath:@"view.backgroundColor"];
Key Value Observing:
Key-value observing is a mechanism that allows objects to be notified of changes to specified properties of other objects
For e.g. The UITextfield has delegate whenever it’s text changes, but it doesn’t have the delegates to inform about it’s colour changes. You can observe those with the “Key Value Observing”.
When you add an object as an observer for a textfield for it’s text property, whenever the text value of the textfield changes, the observer method of the object is called with the arguments.
    [myTextField addObserver:self forKeyPath:@"text" options:NSKeyValueObservingOptionNew | NSKeyValueObservingOptionOld context:NULL];

-(void)observeValueForKeyPath:(NSString *)keyPath ofObject:(id)object change:(NSDictionary *)change context:(void *)context{
    NSLog(@"%@ \t %@ \t %@", keyPath, object, change);
}
The KVC can be used for our custom objects by default. You don’t have to do anything separately to support the KVC i.e
[myObject setValue:@"Hello" forKey:@“foo”];
will work if the myObject have a property called foo.
But to support KVO for your custom objects you have to make use of the following methods inside object's class.
[self willChangeValueForKey: @"foo"];
[self didChangeValueForKey: @"foo"];

KVC and NSArray:
NSArray has some amusing functions with KVC's. You can see them in the following screenshot.


ScreenShot:


KVC in Xib:

     You can use the KVC directly in the Xib also. See the following screenshot. I have changed the corner radious of a view directly in the Xib itself. No coding needed. You can do the same for your own custom objects too.


Notes:
    If the object doesn't have the key you passed, the setValue:forKey: will raise an exception. 
    The keys are case sensitive.
    The KVC is little slower.

References:


Monday 2 February 2015

#warning pragma in XCode

#pragma's are one of the interesting part of the XCode, which helps to organise your code.
When your .m file contains thousands of line and hundreds of methods, the file becomes clumsy.

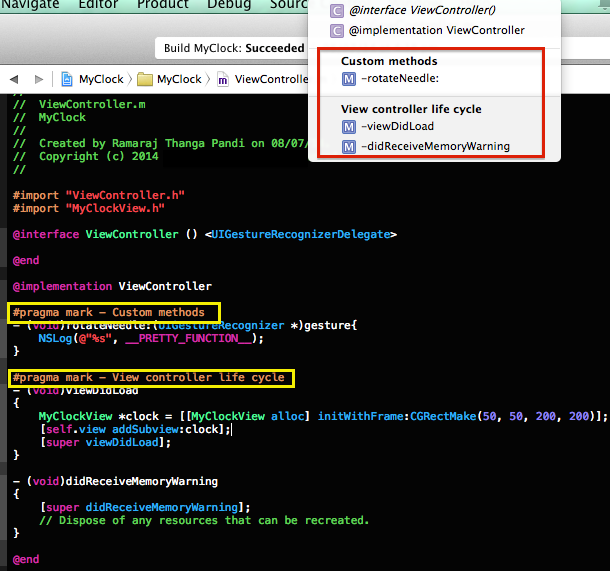
You can avoid this by structuring the code by grouping methods with pragma marks. When you give pragma directive over a method, all the methods under this pragma are grouped together in the document items. You can see that in the following screenshot.


But the fun part doesn't end here.

Have you ever hard-coded something in your code for testing something, and you forget that completely. Well, that happens a lot. What if something reminds you to fix this when you finish your work?

XCode have a pragma directive particularly for this. It is the #warning pragma. Whenever you give a warning pragma anywhere in your code, the XCode compiler gives a real warning (yellow triangle that appears near the line number). You can see the compiler warning in the line navigator, Issue navigator like the other XCode warnings.

But this doesn't stop your code from executing, you can use the #error pragma if you want to stop the code from execution.


You can also make use of some comments that start with the following keywords.
// FIXME:, // ???,  // !!!, // MARK

The comment you enter after these will appear in the document items (Option + 6).